No tolerance for errors in the injection molding process
The SKZ Plastics Center develops customized thermographic measurement systems according to individual customer requirements and integrates them seamlessly into existing processes. It combines expertise in measurement technology with that of plastics technology and offers comprehensive solutions for product quality assurance.

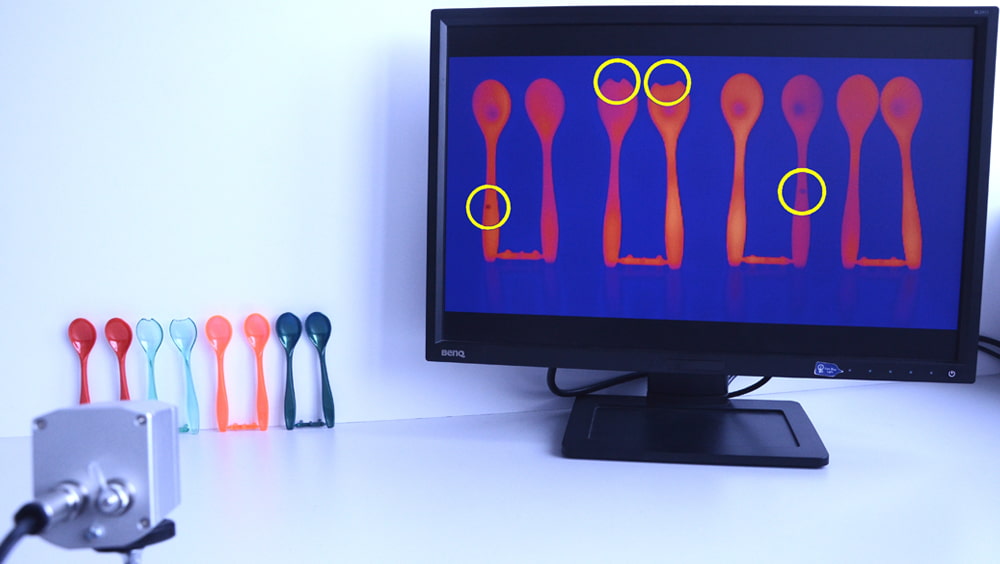
Non-destructive testing of injection-molded spoons using thermography. Both visible surface defects and hidden irregularities, some of which are characteristic of injection molding, are reliably detected. (Photo: SKZ)
Automated thermographic measurement system ensures outstanding product quality
The use of injection molding processes in the mass production of plastic articles is indispensable today. In view of the constantly increasing requirements in the high-performance sector, quality control during production is becoming increasingly important. Quality assurance is crucial both on the production line and on the finished component in order to identify defects such as sink marks, pores, cavities, cracks, or warping, thereby ensuring product quality. In this context, SKZ is developing innovative measurement and testing systems based on thermography using cost-effective thermal imaging cameras in research and development projects.
A distinction is made between passive and active thermography, depending on the application. While passive thermography measures and analyzes the intrinsic heat of the freshly molded object using an infrared camera, active thermography requires targeted heating of the component, for example using flash lamps. This provides insights into the interior of the test object. Measurement systems based on thermography enable automated and process-accompanying error detection, even for complex components. This allows complete control without complex automation technology.

